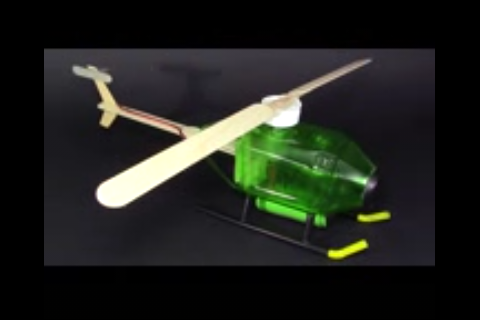
How I created a locally made helicopter that lifts using a plastic rubber.
You can be an inventor/or a manufacturer at home, with what you claim to be a waste.
More published contents which may interest you to read are-:
I will teach you on how I used a plastic bottle water, to construct a local helicopter at home. It is easy, and cool; simply/and kindly work with me through these steps-:
STEPS TO TAKE ON HOW TO CREATE A LOCALLY MADE HELICOPTER
Before I work you through these steps, I will briefly list out some of the required equipment for this technology.
a) One plastic bottle water empty. You can use anything, as you please.
b) A pair of scissors for cutting.
c) A soldering iron
d) Batteries, I used two microphone batteries.
e) Metal; I used a sheet of Pepsi can.
f) Two Motor Rotor (this provides a lifting force to the helicopter); I used Stereo Motor.
g) Gum/and glue
h) Landing gear; I used a straw stick to form my own landing gear stick.
i) Switch
j) Pair of wires.
k) Sole-tape
When you have all these equipment in stock and ready, then it's time to create your own helicopter. Work with me through these steps-:
First step-: Cut of the plastic rubber
The first thing you need to do is to neatly cut off the bottom part of your plastic rubber. Give a cool syringe cutting of the plastic bottle bottom.
Note-: After the bottle is cut off, use the top part of the bottle for your project.
Second step-: Bore a hole on the plastic bottle.
Use your heated soldering iron to bore little holes on the cut off plastic bottle (the top part).
Third step-: Connect your Motor with the pair of wires.
Kindly/and gently connect the copper wire to your motor (I used Stereo motor). Put the positive wire in the positive position/or port, and the negative wire to the negative position/or symbol/or port; then solder it gently and carefully.
Fourth step-: Place and glue the connected motor to the top bottle, through the opened hole.
When you are through connecting the motor, gently fix it to the top plastic bottle inside the bottle, through the tiny hole.
Note-: only the motor head should be seen outside.
Then glue the body of the motor to the plastic bottle, so as to enable it stay steady and neat.
Fifth Step-: Measure and cut off a little sheet from your Pepsi can/or metal sheet.
In order to make a clean closure of the back opening of your cut off-top bottle, cut off a flat sheet from your metal (I used a Pepsi can for this). Place the cut off sheet to the last end of your plastic rubber and then glue it.
Then cut off another long sheet for a tail, glue it to the flat metal sheet used in covering the bottom of your plastic bottle.
Six step-: Form a tail, and place the second motor to it.
Cut off again another piece from the Pepsi sheet, glue it to the constructed tail in the helicopter. Then you connect the second motor and place it to the tail point (apply same connecting process from step three, in this step to connect your tail motor rotor).
Seventh step-: Connect your switch and batteries.
Glue the switch at the top/or side of your helicopter. Then connect and solder wires to the appropriate positions (follow processes in step 3), then glue it to the body of the helicopter.
Eight step-: Glue the batteries/or battery.
Place the battery beneath/or directly under the motor. Use the solo-tap to gum the copper wires at the positive and negative end; then glue the battery to the body of your helicopter (I glued mine beneath my helicopter, you can glue yours at same position/or another).
Ninth step-: Create a landing gear.
In order to ensure a safe and perfect landing of your helicopter, a landing gear needs to be attached to it. I used straw, you can use metal sheet/or any thing of your choice, as long as it will give you a landing gear.
Measure and cut it into four, apply glue to each little openings; and glue it to the helicopter (do this at one edge and the other edge as well).
Tenth step-: Form a head and tail rotor/or fan (as it is referred to in most cases).
In constructing this, I also made use of metal sheet from my Pepsi cut off can. Measure the sheet of 12.5m for a cool flexible lifting. Use the cap/or cover of your plastic bottle, cut/or give a little pinch of cap/or cover; bore a hole on it using your soldering iron, glue the cut off 12.5m sheet, on the cap/or cover and place it on the top motor of your helicopter (that's the one placed on step four).
Cut off two little sheet again, dig a sizeable tiny hole on both sheets, place it on the second motor rotor found on the tail of your helicopter and glue it on the tiny iron rod of the motor.
Last step-: Test your helicopter
When all these steps are applied, it's time to switch on your constructed helicopter, and put it to test. Wonderful isn't it?
Don't forget to ask a question, if you are stocked.


Before starting out a soldering iron has to be bought. As there is a very wide range of irons that are available, the choice of the correct one is necessary if the best job is to be made of building any circuits and projects. Check out reviews from this website.
ReplyDelete